
In short: How is ETICS (mantolama) applied? On a sound, clean exterior wall it takes seven steps: a starter profile is fixed, the adhesive is mixed, the boards are bonded in a staggered pattern, anchors go in at least 24 hours later, the base coat is applied in two layers with mesh at least 2 days after bonding, and the job ends with a decorative finish coat and paint. The board adhesive is applied between +5 and +35 °C.
This guide is written for building owners and the applicators who take on the job. Times, quantities and temperature values come from Mega’s MegaTech technical data sheets, and application details from the thermal insulation applicator qualification of Turkey’s Vocational Qualifications Authority (MYK). The layers of the system are covered in what ETICS is, and board selection in our guide to types of exterior wall insulation.
How is ETICS applied? The 7 steps
ETICS consists of seven consecutive steps in which the boards are bonded to the wall, fixed with anchors and protected by a mesh-reinforced render. The order of the steps never changes, and the waiting times between them are not shortened.
- Starter profile: A starter (base) profile, levelled with a spirit level, is anchored along the lower edge of the insulation. The first row of boards sits on this profile.
- Mixing the adhesive: A 25 kg bag of board adhesive is mixed at low speed with 5.5–6 litres of clean water. According to the Mega MTA-3333 data sheet, the mix must be used within 2 hours at most.
- Bonding the boards: If the wall is flat, the adhesive is combed onto the back of the board with a notched trowel; if not, it is applied in dabs. Boards are laid from the bottom up in horizontal rows, staggered so that joints do not line up.
- Anchoring: Anchors are installed at least 24 hours after bonding, once the adhesive has hardened. Their number and layout follow the project and the system data sheet.
- First base coat and mesh: At least two days after bonding, the first layer of base coat is applied, and the alkali-resistant reinforcing mesh is embedded in it while it is still wet.
- Second base coat: The second layer covers the mesh completely and prepares the surface for the finish.
- Decorative finish coat: Once the base coat has dried, a decorative mineral render about 2 mm thick is applied and painted after it dries.
Before you start: substrate check and weather conditions
ETICS can only be applied to a sound, clean, even and dry wall. Work does not start if the air temperature is outside the range in the product data sheet (+5 to +35 °C for Mega board adhesive) or if frost, rain or strong wind is expected.
Scaffolding is also set up at this stage. The MYK qualification considers a simple work platform sufficient up to 4 metres and requires scaffolding erected under a safety specialist’s instructions on taller facades.
Substrate checklist
- Dust, dirt, formwork oil, old paint and loose plaster are removed, along with any residue that would weaken adhesion.
- Cracks, holes and broken areas are filled beforehand with a suitable repair mortar.
- Facade flatness is measured with a plumb line and straightedge; deviations too large to take up with adhesive are corrected with a base render before boarding.
- Smooth surfaces such as fair-faced concrete are roughened to improve adhesion. The Mega machine plaster data sheet calls for such surfaces to be prepared with concrete bonding primer 1 day before application.
- On existing buildings, window sills are checked to see whether they will still project beyond the insulation once the boards are added; sills that fall short are replaced or extended with a profile.
- Board thickness is set by the thermal insulation design; details are in our article on how thick ETICS insulation should be.
Weather and temperature conditions
According to the data sheet of Mega MTA-3333 board adhesive, the ambient temperature must be between +5 and +35 °C; for the base coat and the finish, the temperature range in each product’s own data sheet is checked separately. Nothing is applied to frozen or thawing surfaces or where frost is possible within 24 hours; direct sun, rain, strong wind and sun-heated hot surfaces are also unsuitable. We explain which season works best in our article on when to apply ETICS.
Steps 1–3: Starter profile, mixing the adhesive and bonding the boards
In the first three steps the boards are fixed to the wall; if the starter profile is not level, the whole facade rises out of true.
The starter profile is installed horizontally at the level where the insulation begins and, as described in the MYK qualification, fixed level with at least 3 anchors per metre. The profile width is chosen to match the board thickness.
How is the adhesive mixed?
Mega thermal insulation board adhesive (MTA-3333) needs 5.5–6 litres of clean water per 25 kg bag. Water goes into the bucket first, the powder is added gradually and mixed with a low-speed mixer to a lump-free consistency. The data sheet gives a working time of 10–15 minutes and a pot life of 2 hours at most; the mix in the bucket is used up within two hours. No water or powder is added to the mix afterwards; mortar that has skinned over or passed its pot life is discarded.
Notched trowel or dabs?
The flatness of the wall decides. According to the Mega data sheet, if the substrate is flat the adhesive is combed onto the back of the board with a notched trowel; if not, it is applied in dabs. The MYK qualification puts numbers on this: a notched trowel on surfaces deviating up to 0.5 cm over 3 metres, and the bead-and-dab method on surfaces deviating up to 1 cm. In this method the adhesive goes on as a bead around the board edges and dabs in the middle.
When pressing the board into place, care is taken that adhesive does not squeeze out at the edges, because mortar in the joints can create a thermal bridge. At building corners the boards are interlocked; at window and door corners the board is cut in one piece to an L shape so that no joint falls on the corner of the opening. Flatness is checked with a straightedge after every row.
Step 4: When are the anchors installed?
Anchoring is done after the adhesive has hardened. Depending on ambient temperature and the substrate, the Mega MTA-3333 data sheet requires mechanical anchoring to take place at least 24 hours after the boards are bonded.
Anchor length is chosen according to the wall material and the board thickness. The number and layout are set out in the system data sheet and the application design; the MYK qualification likewise requires anchoring to comply with the technical specification. The anchor head is set flush with the board surface; a head that sinks in or sticks out shows through the render. We cover the number of anchors per square metre in our article on how many ETICS anchors are needed.
Steps 5–6: How is the mesh-reinforced base coat applied?
The base coat is applied in two layers with the mesh between them. According to the Mega MTA-3333 data sheet, the base coat is started no earlier than 2 days after the boards are bonded.
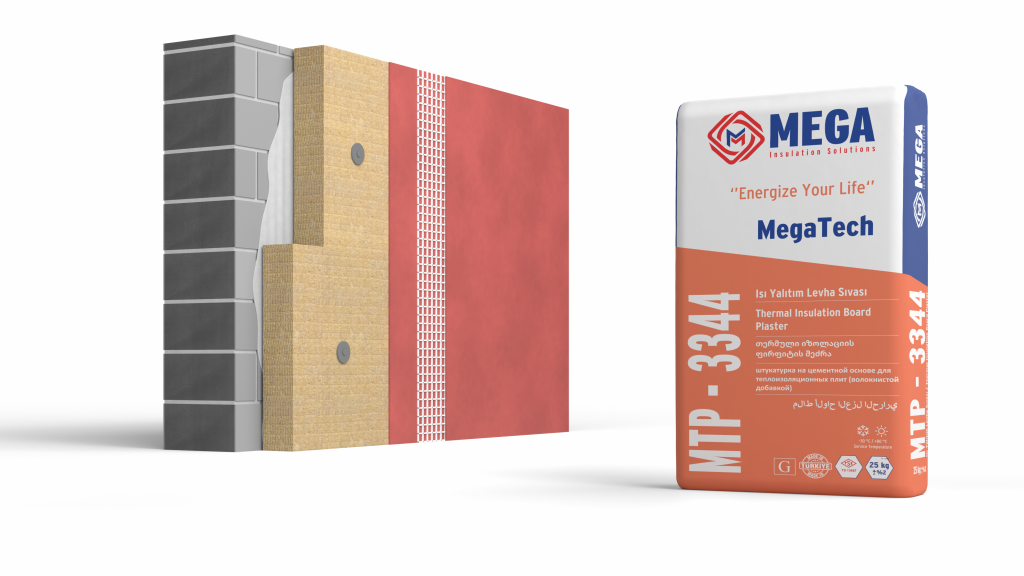
Mega thermal insulation board render (MTP-3344) is cement-based and fibre-reinforced; according to its data sheet it is applied about 4 mm thick at 3.5–5.5 kg per square metre. The data sheet specifies a 160 g/m² alkali-resistant reinforcing mesh, overlapped by 10 cm at the joints and embedded in the render.
Following the sequence in the MYK qualification, the mesh is pressed lightly into the first layer with a steel trowel while it is still wet. The second layer is applied so that about two thirds of the total thickness lies below the mesh and one third above it; where the specification requires, the first layer is left to dry first. Corner and drip profiles are also bedded in the base coat render. Extra mesh patches are placed at window and door corners at a 45° angle to the corner; this reinforcement strengthens the corners of openings where stresses concentrate.
Step 7: How is the decorative finish coat applied?
The finish is applied with a decorative mineral render once the base coat has dried, and completed with paint. Mega decorative mineral render (MTD-3355) is a cement-based, polymer-modified, water-repellent finishing material.
According to the product data sheet, the application thickness is 2 mm and consumption is 2.2–2.5 kg/m². The product page states that this render must not be left bare as the final layer and must be painted once dry. To avoid lap marks, each facade section is finished without a break, from corner to corner.
What are the drying and waiting times in ETICS?
In ETICS the schedule is set by material waiting times: at least 24 hours before anchoring, at least 2 days before the base coat, and the finish only after the base coat has dried. The table collects the values from Mega’s MegaTech data sheets in step order.
| Step | Mega product | Time and waiting | Quantity |
|---|---|---|---|
| Mixing the adhesive | MTA-3333 board adhesive | Working time 10–15 min; mix used within 2 hours at most | 5.5–6 L water per 25 kg bag |
| Bonding the boards | MTA-3333 board adhesive | Application temperature +5 / +35 °C | 3–5 kg/m² |
| Anchoring | Anchor suited to the system | At least 24 hours after bonding | As per system data sheet and design |
| Base coat and mesh (1st and 2nd layer) | MTP-3344 board render | Started at least 2 days after bonding | 3.5–5.5 kg/m²; about 4 mm; 160 g/m² mesh, 10 cm overlap |
| Finish coat | MTD-3355 decorative mineral render | After the base coat has dried; painted once dry | 2.2–2.5 kg/m²; 2 mm |
Source: Mega MTA-3333, MTP-3344 and MTD-3355 technical data sheets. According to the data sheets, the products can be stored for 12 months from production under suitable conditions.
These times apply to one facade section; the whole building takes longer depending on wall area, scaffolding, the number of crews and the weather. In a good schedule the crew renders the facade whose waiting time is over while bonding boards on another.
How is stone wool ETICS applied? Differences by board type
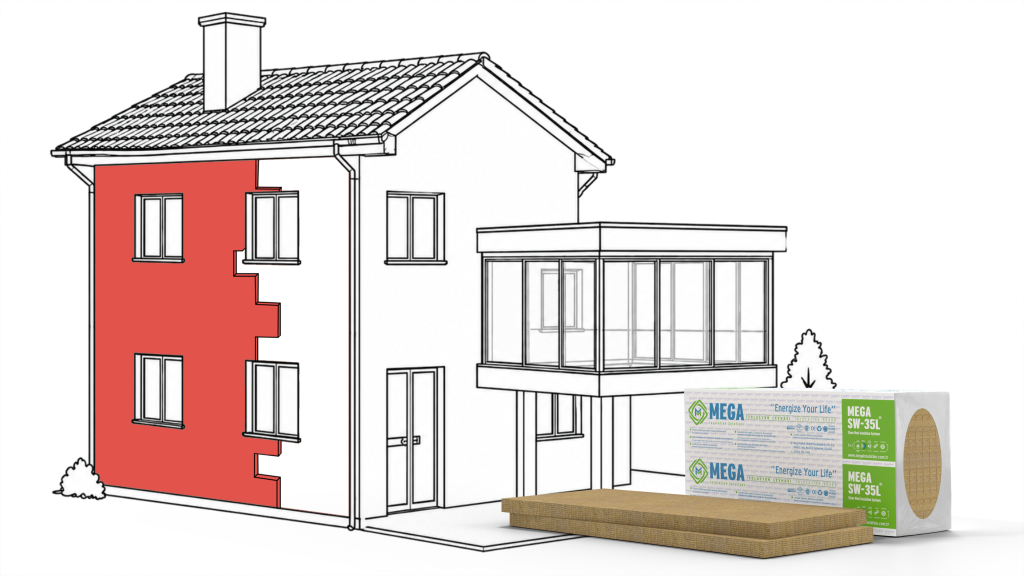
Stone wool ETICS follows the same seven steps; the differences lie in board weight, board size and anchor selection. Mega stone wool ETICS board of type MEGA SW F150 has a density of 150 kg/m³ (±10%) according to its data sheet and is considerably heavier than EPS board, so anchor type and number are set according to the system data sheet.
On the EPS side, Mega’s white EPS ETICS board and carbon/graphite-enhanced grey EPS ETICS board are used; according to its data sheet, MTA-3333 adhesive is suitable for stone wool, EPS and XPS boards. We compare the board types in our articles stone wool or EPS and XPS or EPS.
| Property | Stone wool ETICS board (MEGA SW F150) | EPS ETICS board (EPSW / EPSG) |
|---|---|---|
| Board size | 1200 x 600 mm | 500 x 1000 mm |
| Thickness | 40–120 mm | 10–100 mm |
| Thermal conductivity λD | ≤0.037 W/mK | By type: EPSW 0.034–0.042 W/mK; EPSG 0.031–0.036 W/mK |
| Reaction to fire class (EN 13501-1) | A1 | E |
| Product standard | EN 13162 | EN 13163 |
Source: Mega SW F150, EPSW and EPSG technical data sheets.
The first thing to watch with stone wool boards is moisture: boards are protected from rain on site and render goes only onto dry boards.
According to Mega’s technical data sheets, EPS boards are class E under EN 13501-1, which means they are combustible. Under Article 27 of Turkey’s Regulation on Fire Protection of Buildings, the facade of a building taller than 28.50 m must be made of materials of limited combustibility, and on other buildings of at least hardly flammable materials. On buildings lower than 28.50 m with a facade system in the hardly flammable category, the first 1.5 m above ground level is clad with non-combustible material; if the building is taller than 6.50 m, non-combustible fire barriers at least 15 cm wide at the sides and 30 cm wide at the top of openings such as windows are also required.
According to their technical data sheets, Mega stone wool ETICS boards are class A1; in the regulation, A1 corresponds to non-combustible material. The same article requires the system of board, adhesive, anchors, mesh and render to be certified as a system by an accredited laboratory, so the components are chosen from a single system. Which facade system is appropriate is assessed project by project by an authorised engineer or fire consultant. We explain what the classes mean in our article on fire classes of insulation materials.
Applicator checklist: 10 points before handover
Before handover, the facade is checked against these ten points. Some of them cannot be seen once the render is on, so each check is made and recorded as the relevant step is completed.
- Starter profile: Level, continuous along the facade and securely fixed.
- Board layout: Boards staggered, vertical joints not aligned with the row below, no open joints between boards.
- Corners and openings: Boards interlocked at building corners; boards cut in one L-shaped piece at window and door corners.
- Bonded area: No adhesive squeezed out at board edges. Under the MYK qualification criterion, a board removed for checking should show at least 40% of its surface bonded to the wall.
- Anchors: Installed at least 24 hours after bonding, heads flush with the board surface.
- Waiting time: Base coat started at least 2 days after bonding; temperature stayed within the range in each product’s data sheet on application days.
- Mesh: Alkali-resistant, overlapped by at least 10 cm at joints and embedded in the render; no mesh pattern visible on the surface.
- Profiles and reinforcement: Corner and drip profiles in place; 45° reinforcing mesh at window and door corners.
- Finish coat: Decorative render finished without lap marks and painted once dry.
- Water path: Window sills project beyond the insulation, and rainwater is not directed behind the system.
Application note from MegaUsta: Check at the end of each step, not when the job is finished: photograph the joints and corners after bonding, the anchor heads after anchoring, and the mesh overlaps after the first base coat layer. Once render and paint are on, these details can no longer be seen, while the photos stay on record for both the applicator and the client.
We cover the causes behind problem points in our article on common ETICS application mistakes, and the questions to ask before hiring in our guide on how to choose an ETICS applicator.
Frequently Asked Questions
How long does an ETICS job take?
How long ETICS takes depends on the wall area, the scaffolding plan, the number of crews and the weather, so no single figure applies to every building. What does not change are the material waiting times: according to the Mega MTA-3333 data sheet, anchors go in at least 24 hours and the base coat at least 2 days after bonding. The finish coat follows only once the base coat has dried, so no facade section is finished in a single day.
How many days after bonding the boards can the base coat be applied?
With Mega MTA-3333 board adhesive, the base coat is applied at least 2 days after the boards are bonded. Anchoring takes place within this period, at least 24 hours after bonding. Because mortar hardens more slowly in cold and damp weather, the time on the data sheet should be treated as the minimum wait. If a different system is used, the time in that system’s data sheet applies.
In what pattern are the boards bonded in ETICS?
Boards are bonded upwards from the starter profile in horizontal rows and in a staggered pattern, so the vertical joints of one row never line up with those of the row below. No gaps are left between boards, and at building corners the boards are interlocked. At window and door corners the board is cut in one piece to an L shape so that no joint falls on the corner, and flatness is checked with a straightedge on every row.
How many coats of render does ETICS need?
The base coat is applied in two layers with the reinforcing mesh between them: the mesh is embedded while the first layer is still wet, and the second layer covers it. According to the Mega MTP-3344 data sheet, the base coat is about 4 mm thick and uses 3.5–5.5 kg per square metre. A 2 mm decorative mineral render goes on top and is painted once it has dried.
Sources
- MYK: National Qualification 12UY0057-3 Thermal Insulation Applicator (Level 3)
- Regulation on Fire Protection of Buildings (mevzuat.gov.tr)
- Mega MTA-3333 board adhesive data sheet (PDF)
- Mega MTP-3344 board render data sheet (PDF)
- Mega MTD-3355 decorative mineral render data sheet (PDF)
- Mega SW F150 stone wool ETICS board data sheet (PDF)
- Mega Insulation documents page
We explain the roles of adhesive, render and primer in our article on what construction chemicals are.
Mega Insulation Solutions (Mega Yalıtım) is a Turkish manufacturer of insulation materials headquartered in Kavacık, Istanbul, with its plant in Elazığ; alongside stone wool, XPS and EPS insulation boards, it offers MegaTech construction chemicals under the Mega brand. For questions about board selection and MegaTech products, you can reach our technical team via the Mega Insulation contact page.