

In short: Underfloor heating insulation is the insulation layer laid beneath the heating pipes to stop heat escaping into the floor slab, the storey below or the ground. The correct order is: insulation board on the structural slab, the heating board that holds the pipes on top of it, then the pipes, the screed and finally the floor covering. Thickness depends on what lies beneath the floor.
With underfloor heating the heat source sits inside the floor, so the floor is both the heater and a surface through which heat can be lost. Below we cover the layers, board selection and common mistakes. For the material, see our article what is EPS.
Why is insulation under underfloor heating essential?
Insulation below is essential because heat spreads in every direction: without insulation under the pipes, part of the heat goes into the floor slab and the space beneath instead of the room. Insulation below cuts off that path and directs heat upwards into the living space.
The loss is greatest on floors with the ground, an unheated space or outside air beneath them: ground floors, floors above open pilotis and storeys above basements. On an intermediate floor where the flat below is also heated, the loss is smaller but not zero. That is why EN 1264-4 sets different minimum thermal resistance values depending on the conditions below.
Why are heating pipes fixed onto a board?
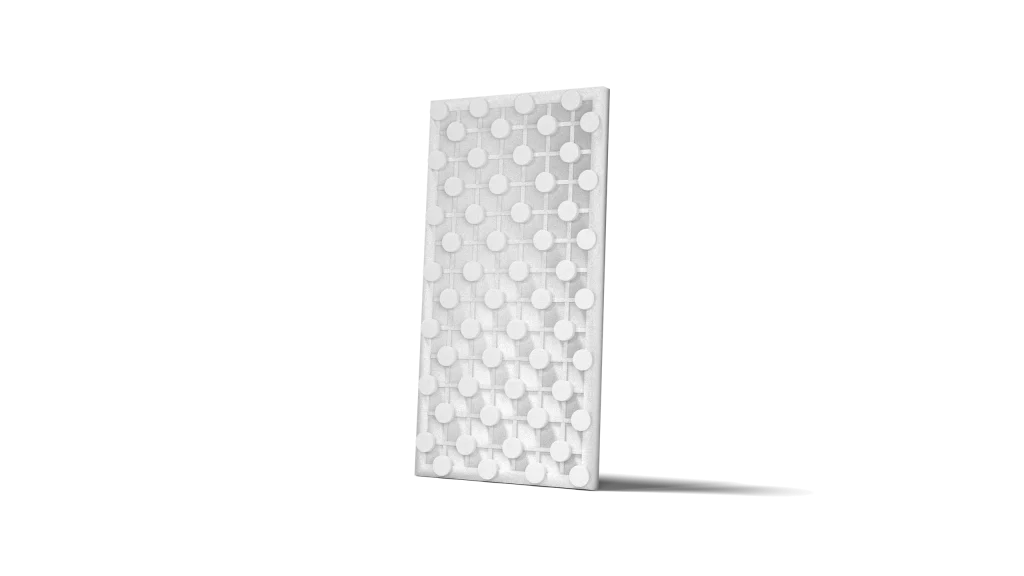
Pipes are laid at a calculated spacing so that heat is distributed evenly across the floor, and the board keeps that spacing while the screed is poured. As described on its product page, Mega’s EPS underfloor heating board fixes the hot water pipes to the floor with an even distribution; it makes laying PEX pipes indoors easier and also contributes to thermal insulation.
The heating board carries the pipes and organises their layout. In the insulation calculation, however, the main layer is taken to be the XPS or EPS boards whose thermal conductivity and compressive strength are documented in data sheets.
What is the correct layer order for underfloor heating?
From bottom to top the order is: structural slab, thermal insulation board, heating board, pipes, screed and floor covering. An edge strip along the walls and, where needed, waterproofing are added to this.
- Structural slab: The concrete surface must be clean, dry and level; irregularities let the boards move.
- Waterproofing: On floors in contact with the ground, the waterproofing specified in the design is applied before the insulation boards.
- Edge strip: Fixed along the base of walls and columns so that it rises above the screed level.
- Thermal insulation board: XPS or EPS boards of the calculated thickness are laid with staggered joints and no gaps. On intermediate floors the impact sound board also sits in this layer.
- Heating board: The EPS board that holds the pipes at the calculated spacing is placed on top of the insulation.
- Pipes: Laid according to the circuit plan in the design; the pipes are kept under pressure while the screed is poured so that any leak is noticed at once.
- Screed: Poured and compacted so that it surrounds the pipes without voids.
- Floor covering: Ceramic tiles, natural stone, parquet or laminate are laid once the screed has dried sufficiently.
Application note from MegaUsta: Do not trim the protruding part of the edge strip right after pouring the screed. The strip stays in place until the floor covering is finished, and the excess is cut flush with the covering afterwards.
How do you choose thickness and compressive class for underfloor heating insulation?
Thickness is chosen according to what lies beneath the floor and the thermal conductivity (λD) of the board; thermal resistance is found by dividing the thickness by the λD value. The compressive class is set so that the board performs under the screed and service loads without being crushed.
Planning guides based on EN 1264-4 give the following minimum values for the insulation under the heating layer. The example thicknesses are a simple calculation we made with the λD values in Mega data sheets; the heating board is not included.
| Condition below the floor | Minimum thermal resistance (m²K/W) | With MEGA XPS T3000 (λD 0.035 W/mK) | With MEGA EPS 100W (λD 0.036 W/mK) |
|---|---|---|---|
| A heated room | 0.75 | 30 mm ≈ 0.86 | 30 mm ≈ 0.83 |
| Unheated or intermittently heated room, the ground, or outside air with a design temperature above 0 °C | 1.25 | 50 mm ≈ 1.43 | 50 mm ≈ 1.39 |
| Outside air, design temperature between 0 °C and -5 °C | 1.50 | 60 mm ≈ 1.71 | 60 mm ≈ 1.67 |
| Outside air, design temperature between -5 °C and -15 °C | 2.00 | 70 mm = 2.00 | 80 mm ≈ 2.22 |
Source: system guide based on EN 1264-4; λD values from Mega data sheets. Where the groundwater table is closer than 5 m, the guide recommends raising the value given for floors on the ground.
These values are lower limits. The final thickness is set in the thermal insulation design: Türkiye’s Regulation on Energy Performance in Buildings requires this design, prepared by an authorised mechanical engineer using the TS 825 method, at the building permit stage. The compressive class is assessed together with the load the floor will carry; for the differences between types, see our article on XPS compressive strength.
XPS or EPS for underfloor heating?
Both can be used; moisture and load conditions decide. On ground floors in contact with the soil or at risk of moisture, XPS stands out for its low water absorption and high compressive strength; on dry intermediate floors EPS can also be sufficient.
Mega’s flat XPS board lists floors, under-parquet use and floor heating systems among its applications. The white EPS ETICS board also lists floors among its applications. The values below are taken from Mega data sheets:
| Board (Mega type) | Material | λD (W/mK) | Compressive strength at 10% deformation | Long-term water absorption | Thickness range |
|---|---|---|---|---|---|
| MEGA XPS T1500 | XPS | 0.035 | 150 kPa | ≤0.7% (total immersion) | 20–80 mm |
| MEGA XPS T3000 | XPS | 0.035 | 300 kPa | ≤0.7% (total immersion) | 20–120 mm |
| MEGA EPS 100W | White EPS | 0.036 | 100 kPa | ≤3% (total immersion) | 10–100 mm |
| MEGA EPS 120W | White EPS | 0.034 | 120 kPa | ≤2% (total immersion) | 10–100 mm |
| MEGA SW FF100/110/120 (floating floor board) | Stone wool | ≤0.036 | 25 kPa | ≤3 kg/m² (partial immersion) | 30 mm |
Source: Mega data sheets. For the general differences, see our comparison XPS or EPS.
Mega Insulation Solutions (Mega Yalıtım) is a Turkish insulation materials manufacturer with its head office in Kavacık, Istanbul and its plant in Elazığ. Alongside the XPS and EPS boards used in underfloor heated floors, it offers the stone wool floating floor board and MegaTech tile adhesives under the Mega brand.
How is it combined with sound insulation on intermediate floors?
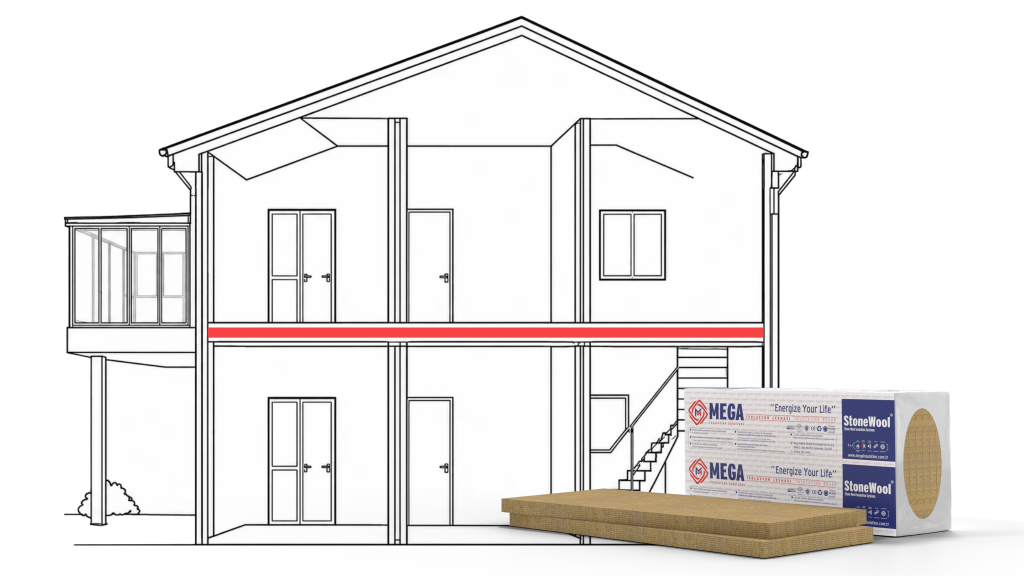
On an intermediate floor, underfloor heating can be combined with the floating floor principle that reduces impact sound: the acoustic board is laid beneath the heating layer, and the screed is poured separated from the walls by the edge strip.
According to its product page, Mega’s stone wool floating floor board is used for thermal, sound and vibration insulation under screed between two concrete layers; its data sheet gives a thickness of 30 mm, λD ≤0.036 W/mK and compressive strength of 25 kPa. Because heating system guides limit the compressibility of the insulation under the screed to a maximum of 5 mm for residential loads, the behaviour of the two boards under load is checked in the design. We explain the whole system in our article what is a floating floor.
What are the most common installation mistakes with underfloor heating?
The mistakes to avoid fall into four areas: the edge strip, pipe layout, screed and first heat-up. The points are compiled from a system handbook based on EN 1264.
- Skipping the edge strip: Heated screed expands and contracts; without a strip it presses against the wall and may crack.
- Pouring large areas without joints: The guide limits a screed bay to a maximum of 40 m² and 8 m per side; L- or Z-shaped areas are divided by joints, and pipes crossing a joint are protected with sleeves.
- Running pipes against the wall: Pipes are kept more than 50 mm from walls; spacing is set by calculation, not by eye.
- Guessing the screed thickness: Thickness is selected from the manufacturer’s tables by screed type and load.
- Heating the screed too early: According to the guide, cement screed can be walked on after 7 days, but the first heat-up starts only after 21 days. Screed is not poured at ambient temperatures below 5 °C.
- Choosing the covering without checking its thermal resistance: The guide’s upper limit is 0.15 m²K/W; the value given for ceramic tiles is 0.01 m²K/W, while carpet and solid wood are much higher. For adhesive classes, see our article on the difference between C1TE and C2TE.
From Roman baths to today’s underfloor heating
In Roman baths heat was supplied from beneath the floor. According to English Heritage, the floor was raised on stacks (pilae) of stone or fired clay tiles, heat from a furnace (praefurnium) was fed into the cavity, and the hot air was drawn up through flues in the walls. We cover the details in our article on the hypocaust.
In today’s water-based systems, hot water circulates through pipes instead of hot air, and what directs heat into the living space is not a cavity below but the insulation board beneath the screed.
Frequently Asked Questions
What goes under underfloor heating?
A thermal insulation board is laid on the structural floor slab under underfloor heating, and the heating board that holds the pipes goes on top of it. XPS or EPS boards can be used for the insulation layer, and the thickness depends on whether there is a heated room, the ground or outside air below the floor. On floors in contact with the ground, waterproofing is done first and an edge strip is fixed along the walls.
What determines screed thickness in underfloor heating?
Screed thickness depends on the screed type (cement or calcium sulphate based), its class and the load the floor will carry. System manufacturers publish minimum thickness tables based on these inputs; values for residential loads differ from those for heavily used areas such as shops or halls. The thickness is chosen from these tables in the heating design and is not changed by guesswork on site.
Should XPS or EPS be used for underfloor heating?
Both can be used; moisture and load decide. On ground floors in contact with the soil or exposed to moisture, the low water absorption of XPS is an advantage: according to Mega data sheets, long-term water absorption of XPS boards is ≤0.7%. On dry intermediate floors EPS can be sufficient; MEGA EPS 100W, for example, has a λD of 0.036 W/mK. For both materials, thickness comes from a thermal resistance calculation.
Why does an underfloor heated floor need an edge strip?
The edge strip leaves room for the heated screed to expand and separates the screed from fixed elements such as walls and columns. Without it, the screed presses against the wall as it expands, may crack, and heat and sound pass straight into the wall. According to guides based on EN 1264, the strip must be compressible by 5 mm. It stays in place after screeding; the excess is trimmed once the floor covering is finished.
Which adhesive should be used for ceramic tiles on underfloor heating?
On an underfloor heated floor, choose a highly flexible adhesive that withstands sudden temperature changes. Mega’s ultra-flexible granite tile adhesive MTC-2233, classified C2TE S2, is listed on its product page for underfloor heated systems; its data sheet gives flexibility of ≥5 mm and temperature resistance from -30 to +60 °C. Wait 48 hours before grouting floors.
Sources
- BSI: BS EN 1264-4:2021 (surface embedded heating systems, installation)
- Danfoss: Basic Heating Systems handbook (EN 1264-4 summaries)
- Official Gazette of Türkiye: Regulation on Energy Performance in Buildings
- English Heritage: Baths and Bathing in Roman Britain
- Mega: XPS T3000 data sheet
- Mega: EPS 100W-120W data sheet
- Mega: Floating floor board data sheet
- Mega: MTC-2233 data sheet
- Mega Insulation: Documents
To assess which board and thickness suit what lies beneath your floor, with the data sheets at hand, you can browse our EPS boards page or reach our technical team through the contact page.