
How do you waterproof a bathroom? The waterproofing goes under the tiles and the work proceeds in four steps: the substrate is repaired and cleaned; flexible cement-based waterproofing is applied in at least two coats to the floor and shower walls, together with the corner and drain details; once it has cured, the tiles are laid with an adhesive suited to wet rooms; grouting comes last.
Tiles and grout alone do not stop water. Water that gets through grout soaked every day in the shower reaches the screed, the wall and, over time, the ceiling of the floor below. That makes a bathroom renovation the right moment for waterproofing: once the old tiling is removed, the surface is exposed. If you are planning the bathroom together with general maintenance of the building, our building renovation guide shows the order of work.
Why is bathroom waterproofing done under the tiles?
Tiles and grout are not a watertight layer; the layer that stops water has to sit beneath the tiles, bonded to the substrate. Cement-based grout is a porous material and hairline cracks can form over time; silicone also loses its flexibility over the years.
The tiles protect the waterproofing beneath them from impact and wear; the waterproofing in turn protects the screed, wall and slab below. The requirements and classification of these liquid-applied products used beneath tiles are set out in EN 14891, published in Türkiye as TS EN 14891. Germany’s DIN 18534-1, in turn, governs the design, execution and maintenance of indoor floor and wall waterproofing and classifies surfaces by the degree of water exposure.
Mould on the bathroom ceiling or at the top of a wall is not always a sign of a leak; in poorly ventilated bathrooms the cause is often condensation. Waterproofing is applied against leaks and does not solve condensation.
Which material should be used for bathroom waterproofing?
The most common solution under tiles is two-component cement-based waterproofing. The powder and liquid components are mixed on site, applied by brush or trowel, and cure into a flexible layer with no joints.
Mega’s Fullback Duo products are two-component waterproofing materials based on cement and acrylic. Their product pages list wet rooms among the areas of use, and the products are applied to surfaces such as concrete, plaster and screed. The two options also differ in packaging: Fullback Duo fully elastic consists of 20 kg of powder and 10 kg of liquid component, Fullback Duo semi-elastic of 20 kg of powder and 5 kg of liquid component.
The areas of use listed on the two products’ pages are the same; the difference between them is the level of elasticity. As a general principle, the more movement or temperature change the surface is expected to see, as on a floor with underfloor heating, the more a highly elastic product is needed. The final choice is made according to the current technical data sheet. For mixing, coats and curing, see our article how to apply cement-based waterproofing; for where waterproofing products sit among product groups, see what are construction chemicals.
Mega Insulation Solutions (Mega Yalıtım) is a Turkish insulation materials manufacturer headquartered in Kavacık, Istanbul, with its plant in Elazığ; alongside stone wool, XPS and EPS thermal insulation boards, it offers MegaTech construction chemicals and Fullback waterproofing products under the Mega brand.
| Layer (bottom to top) | Function | Mega option | Point to watch |
|---|---|---|---|
| Substrate | Sound base for the waterproofing to bond to | Concrete, plaster, screed | Cracks and voids are repaired first; the floor is sloped towards the drain |
| Waterproofing | Keeping water out of the structure | Fullback Duo fully elastic (20+10 kg) or semi-elastic (20+5 kg) | At least two coats; tape and collars at corners and drains |
| Tile adhesive | Bonding the tiles to the waterproofed surface | MTC-2222 (C1TE S1), MTC-2221 (C1TE) | Per the MTC-2222 data sheet, tiles are protected from direct contact with water for 24 hours |
| Tiles and grout | Finishing the surface and protecting the waterproofing from wear | Tiles and grout chosen for the bathroom | Grouting after at least 24 hours with MTC-2222; with MTC-2221, after 24 hours on walls and 48 hours on floors |
How is bathroom waterproofing done? The order of work
The work proceeds in the order substrate preparation, waterproofing, tile bonding and grouting; each step waits for the previous one to cure.
- Prepare the substrate: The old tiling and loose plaster are removed and the surface is cleaned. Cracks are filled with repair mortar and any slope fault is corrected with screed. The internal corners where the wall meets the floor are chamfered, and an absorbent surface is lightly dampened before application.
- Finish the plumbing: The floor drain, pipes and tap outlets are fixed in place and the gaps around them are filled. Every hole drilled after waterproofing also punctures the waterproofing.
- Apply the first coat and the details: The mixed Fullback Duo is brushed into the pores. While the first coat is fresh, tape is embedded in the corners and collars around the drain and pipe outlets.
- Apply the second coat crosswise: Once the first coat has hardened, the second coat is applied at right angles to the first; the tapes stay between the two coats.
- Let the waterproofing cure: Until the time given in the data sheet has passed, nobody walks on the waterproofing and tiling does not start.
- Lay the tiles: According to the MTC-2222 data sheet, 25 kg of powder is mixed with 6–6.5 litres of water, the mortar is used within 5 hours, and tiles are placed within 20 minutes.
- Grout the joints: For tiles laid with MTC-2222, grouting is done after at least 24 hours; during this time the tiles are kept away from direct water.
The data sheets of MegaTech powder products limit the application temperature to +5 / +35 °C; they are not applied to frozen surfaces, surfaces at risk of frost within 24 hours, or hot surfaces. This limit needs attention in an unheated bathroom in winter; for Fullback Duo, the range in its own data sheet applies.
Application note from MegaUsta: Fix the positions of taps, drain and fittings before you start waterproofing; touching the plumbing afterwards means puncturing the waterproofing. If you later need to fit a shelf or hook on the shower wall, fill the hole with neutral silicone before driving in the screw.
What needs attention at corners, around the drain and in the shower area?
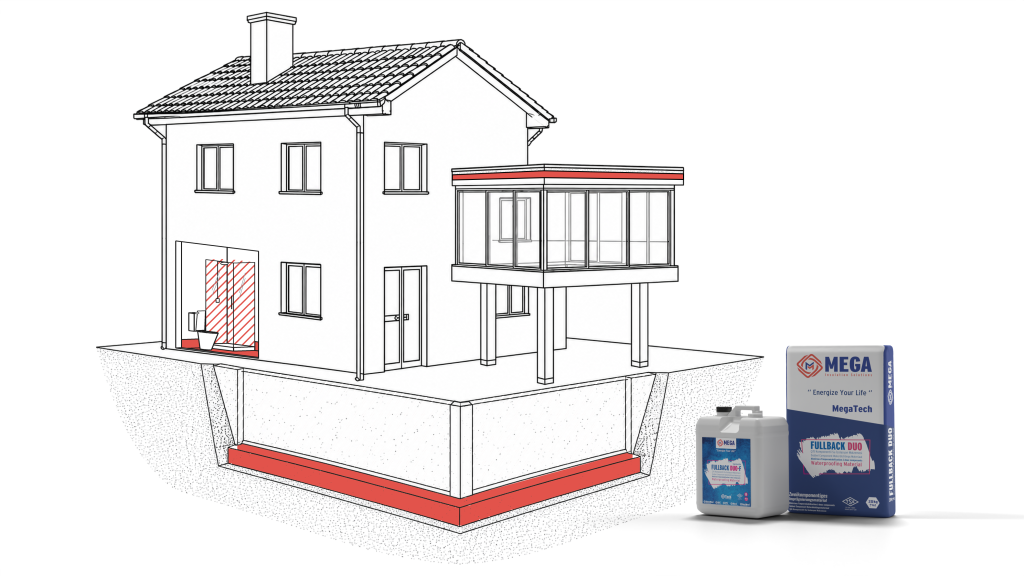
The risk of leaks is highest at junctions: the wall-to-floor corner, the floor drain, pipe outlets and the shower walls. These points need a detail of their own, separate from the flat surface.
- Wall-to-floor junction and internal corners: Corner tape is embedded in the first coat and the waterproofing turns up from the floor onto the wall without a break. The tape must be compatible with the waterproofing product used.
- Drain and gully: The gully is fixed firmly and the waterproofing is connected to its flange or to a collar around it; water cannot escape into the screed around the gully.
- Pipe and tap outlets: A collar is fitted over every pipe coming out of the wall and embedded in the first coat.
- Shower walls: In the shower, water hits the wall directly; the waterproofing is taken up above the shower head. On walls outside the shower, the waterproofing turns up from the floor onto the wall to above skirting height.
- Level-access shower: With a shower level with the floor, water can spread across the whole bathroom floor. In that case the entire floor is waterproofed and sloped directly to the drain.
- Door threshold: The waterproofing continues under the door threshold so that water cannot pass into the corridor screed.
Which adhesive class should be chosen for the tiles?
For small and medium-sized tiles in a bathroom, the C1TE class is sufficient; if the floor is heated or stresses from temperature differences are expected, an adhesive with a deformability class (S1 or S2) is chosen. These codes come from TS EN 12004-1: C1 means a normal cementitious adhesive and C2 an improved one; T means reduced slip, E extended open time; S1 deformable and S2 highly deformable.
| Mega product | Class | Use in the bathroom (product page and data sheet) | Wait before grouting | Consumption |
|---|---|---|---|---|
| Tile and ceramic adhesive mortar MTC-2221 | C1TE | Small and medium-sized tiles; especially wet rooms such as bathrooms and kitchens; tile over tile | 24 hours on walls, 48 hours on floors | 2–8 kg/m² depending on tile size |
| Flex tile and ceramic adhesive MTC-2222 | C1TE S1 | Wet rooms such as bathrooms and kitchens; surfaces with sudden temperature changes | At least 24 hours | 4–8 kg/m² |
| Ultra flexible granite tile adhesive mortar MTC-2233 | C2TE S2 | Wet rooms such as bathrooms and kitchens; areas with sudden temperature changes, such as underfloor heating systems | 24 hours on walls, 48 hours on floors | 4.00–4.75 kg/m² single-sided with a 6x6x6 mm notched trowel |
The values are taken from Mega product pages and technical data sheets. MegaTech tile adhesives are TSE certified under TS EN 12004-1; the certificates are available on the technical documents page.
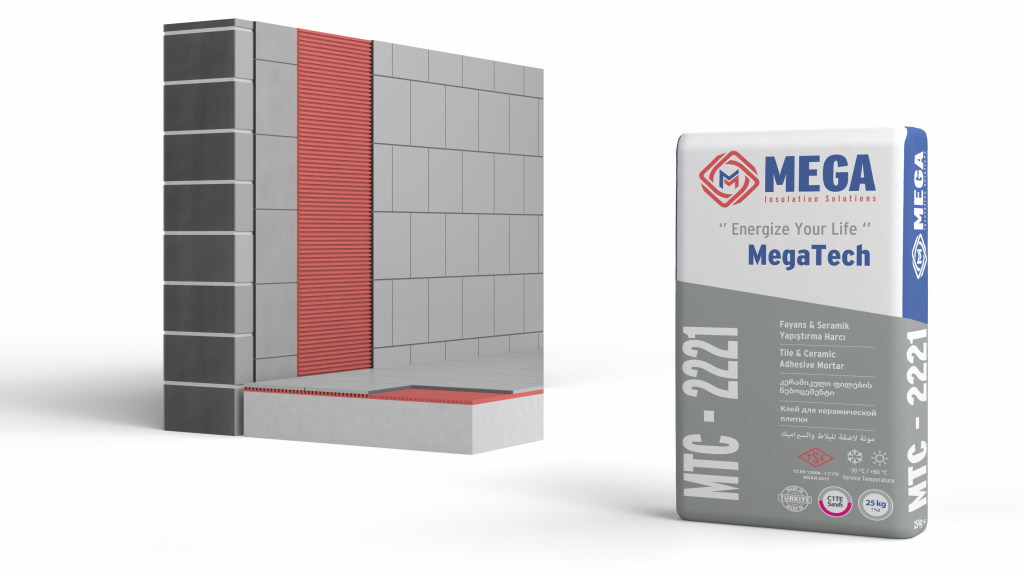
The suitability of the adhesive for the waterproofed surface is checked against both products’ data sheets. A detailed comparison of the classes is in our article on the difference between C1TE and C2TE.
What can be done in a renovation without removing the old tiles?
If the old tiles are sound and there is no leak in the bathroom, new tiles can be laid over them, but this does not renew the waterproofing. If the shower area leaks or the waterproofing is to be renewed, the old tiling is removed.
The Fullback Duo product page lists concrete, plaster and screed as substrates; old tiles are not on that list. MTC-2221, on the other hand, is used for tile-over-tile bonding according to its product page. In other words, a renovation that only renews the finish can be done without stripping, while one that includes waterproofing starts with removal. Details are in our article on tiling over existing tiles.
If there are stains and blistering paint on the ceiling below, or darkened, crumbling grout around the shower, water has already found a way through; in that case stripping is unavoidable.
How is the waterproofing checked after application?
The waterproofing is checked with a flood test before the tiles are laid, so any defect is seen before it is covered. Once the waterproofing has fully cured, the drain is temporarily plugged, the floor is filled with a few centimetres of water and left to stand for a while.
The water level is marked on the wall; if it drops or damp appears on the ceiling below, the defect is located and repaired and the test is repeated. The test duration is set by the waterproofing product’s data sheet and the project specification, if there is one. After tiling and grouting, the shower is not used until the times in the adhesive and grout data sheets have passed.
Frequently Asked Questions
Is waterproofing necessary in a bathroom?
Yes, surfaces that get wet directly, such as the shower area and the bathroom floor, need waterproofing. Tiles and grout do not stop water completely; water passing through the grout reaches the screed, the wall and the ceiling of the floor below. The waterproofing goes under the tiles, onto concrete, plaster or screed. A later repair usually means removing the tiling, so the best time is before the tiles are laid.
How many coats does bathroom waterproofing need?
Cement-based waterproofing in a bathroom is applied in at least two coats, with the second coat brushed at right angles to the first. The corner tape and drain collar are embedded while the first coat is still fresh, so they end up between the two coats. A single coat cannot achieve the thickness everywhere and may leave pinholes open. For coat thickness and waiting time between coats, the product’s technical data sheet applies.
Can tiles be laid without waterproofing?
They can be laid on bathroom walls that do not come into contact with water, but it is not recommended in the shower area or on the floor. Tile adhesive and grout do not replace waterproofing; on a surface in constant contact with water, water sooner or later gets under the tiles. Adding waterproofing to a bathroom tiled without it means removing the tiling. That is why waterproofing goes onto the floor and shower walls before tiling.
What details matter in the shower area?
In the shower area, the most critical points are the wall-to-floor corner, the floor drain and the tap outlets. Corner tape goes into the corners and collars go around the drain and pipe outlets, all embedded in the first coat. On the walls, the waterproofing is taken up above the shower head, and the floor is sloped towards the drain. With level-access showers that have no threshold, the entire bathroom floor is waterproofed.
Which tile adhesive is used over waterproofing?
In a bathroom, a cement-based tile adhesive classified to TS EN 12004-1 is used over the waterproofing. Among Mega products, the C1TE class MTC-2221 and the S1 deformable MTC-2222 are specified for wet rooms; on floors with underfloor heating, the C2TE S2 class MTC-2233 is used, as its product page lists underfloor heating systems. Tiles are laid once the waterproofing has cured for the time given in its data sheet.
Sources
- DIN 18534-1:2025-10 Waterproofing for indoor applications (DIN Media)
- EN 14891:2017 liquid-applied waterproofing beneath tiles (SIS)
- EN 12004-1:2017 adhesives for ceramic tiles (SIS)
- MTC-2222 Flex Tile and Ceramic Adhesive Mortar technical data sheet (Mega)
- MTC-2221 Tile and Ceramic Adhesive Mortar technical data sheet (Mega)
- Mega Yalıtım technical documents
The fully and semi-elastic Fullback Duo options are in the Fullback waterproofing materials category, and MegaTech adhesives in the tile adhesive category. For the right product for your bathroom and the current data sheet, you can reach the Mega Yalıtım technical team via the contact page.