

In short: An exposed concrete primer (concrete bonding primer) is a product applied to smooth concrete stripped from formwork before plastering, leaving a rough intermediate layer for the plaster to grip. How to apply it: the surface is repaired and cleaned, and the primer is mixed and rolled or brushed on in a thin, even coat. According to Mega’s plaster data sheets, plastering starts the next day, once the surface has dried.
Shear walls, columns, beams and ceiling slabs come out of the formwork with a flat, closed surface. Unlike brick or pumice block, exposed concrete offers plaster few pores to grip, which is why Mega’s plaster data sheets call for a separate preparation step on smooth concrete. To see where the primer sits among the product groups, read our article what are construction chemicals.
What is exposed concrete primer and what does it do?
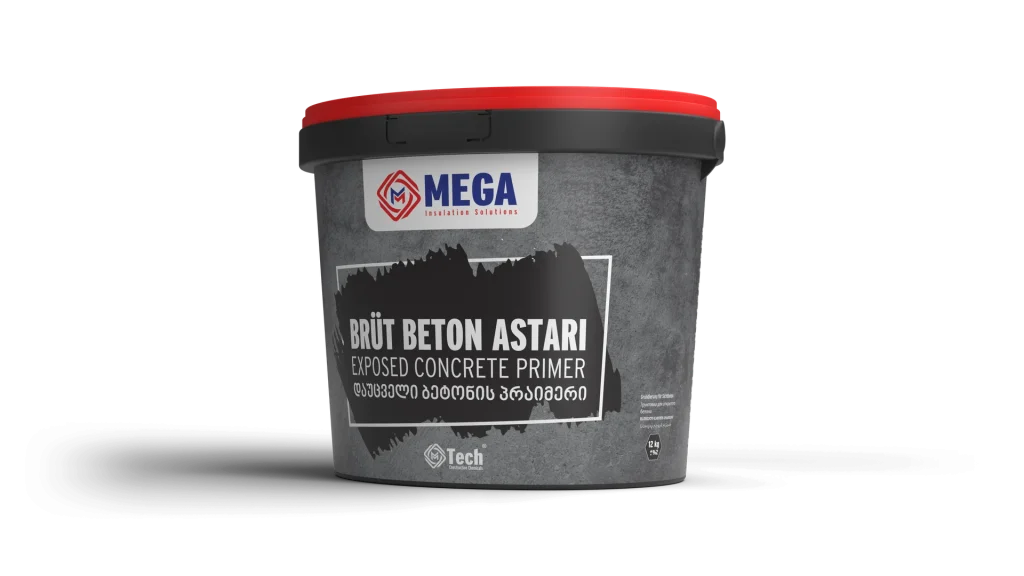
Exposed concrete primer is a surface preparation product that helps plaster mortar adhere to smooth concrete. According to Mega’s product information, MegaTech exposed concrete primer is used indoors, on horizontal and vertical surfaces, beneath gypsum, lime and cement-based mortars to increase adhesion and reduce the absorbency of the substrate.
Adhesion is the strength with which plaster bonds to the substrate. Once the primer dries, a thin, rough layer remains on the smooth concrete, and the plaster grips that layer. Mega’s machine plaster data sheet describes this as roughening the surface with the primer. Reduced absorbency, in turn, helps keep the substrate from drawing water out of the mortar too early.
The mortars that go over the primer are defined by different standards: ready-mixed rendering and plastering mortars based on inorganic binders such as cement and lime fall under EN 998-1, while premixed gypsum plasters for indoor walls and ceilings fall under EN 13279-1. The design and application principles of internal plastering systems are set out in EN 13914-2. Mega’s cement-based machine and hand plasters are defined according to TS EN 998-1.
| Item | What Mega’s sources say |
|---|---|
| Where it is used | Indoors; horizontal and vertical surfaces |
| Function | Increase adhesion and reduce absorbency beneath gypsum, lime and cement-based mortars |
| Packaging | 12 kg and 20 kg buckets |
| Start of plastering | Smooth surfaces are primed 1 day before plastering; plastering starts once the surface has dried |
| Plaster data sheets that mention the primer | MTP-7133 machine plaster, MTP-7111 ready-mixed hand plaster |
Source: MegaTech exposed concrete primer product page, MTP-7133 and MTP-7111 technical data sheets.
Mega Insulation Solutions (Mega Yalıtım) is a Turkish manufacturer of insulation materials headquartered in Kavacık, Istanbul. Under the Mega brand it offers stone wool, XPS and EPS thermal insulation boards, along with MegaTech construction chemicals, which include exposed concrete primer and plasters, and Fullback waterproofing products.
Which surfaces need a primer?
A primer is needed above all on smooth exposed concrete that has come out of formwork: shear walls, columns and beams, and ceiling slabs. Mega’s MTP-7133 machine plaster and MTP-7111 hand plaster data sheets require smooth surfaces such as exposed concrete to be roughened with exposed concrete primer 1 day before plastering.
The same data sheets list the substrates for the plaster as brick, aerated concrete, concrete, exposed concrete, pumice block and concrete block. Preparation on the surfaces most often met on site is as follows:
| Surface | Condition | Preparation before plastering |
|---|---|---|
| Exposed concrete (shear walls, columns, beams, ceilings) | Flat and closed; may carry form oil residue | Cleaning, then exposed concrete primer 1 day before plastering |
| Brick, pumice block, concrete block | Porous and rough | Dust removed, dampened with water if needed |
| Painted wall | The data sheets list paint among substances that reduce adhesion | Paint removed |
| Tiles or ceramics | Smooth cladding; not a substrate defined in the plaster data sheets | Cladding removed for plastering; a tile adhesive chosen for new tiles |
Source: surface preparation clauses of the MTP-7133 and MTP-7111 data sheets.
Priming is one of the first jobs once the structural shell is complete and finishing work begins. We covered where the insulation layers sit during the shell stage in our article insulation during shell construction.
How is exposed concrete primer applied, step by step?
Exposed concrete primer is applied in six steps: repair, cleaning, mixing, dilution if needed, a thin coat and drying. A roller, a brush, a low-speed mixer and a clean bucket are all the job requires.
- Check and repair the surface: The concrete must be sound, with no areas that crumble when pressed by hand. According to the plaster data sheets, cracks and holes are repaired with the same material or a suitable repair mortar; this is finished before priming.
- Clean the surface: Form oil, dust and loose particles are removed. If water sprinkled on the surface stays in droplets instead of spreading, an oily film may remain; in that case clean the surface again.
- Mix the primer: The primer is mixed in the bucket with a low-speed mixer until uniform, and stirred again from time to time on long jobs.
- Dilute only as instructed: If water is to be added, take the ratio from the instructions on the packaging; never add water by eye, and ask Mega’s technical team if in doubt.
- Apply thinly and evenly: Roll or brush the primer on in a thin coat without gaps; finish corners and beam edges with a brush.
- Let it dry: Protect the primed surface from dust, water and knocks. According to the plaster data sheets, plastering starts the next day, once the surface has dried.
Application note from MegaUsta: Hold a light at a low angle to the surface while you prime. Primed areas take on a rough texture, while missed strips stand out at once against the flat face of the concrete.
When can plastering start after priming?
Plastering starts the next day, once the primed surface has dried. The data sheets for Mega’s MTP-7133 cement-based machine plaster and MTP-7111 ready-mixed hand plaster require exposed concrete to be primed 1 day before plastering and plastering to begin after the surface has dried.
Drying speed depends on temperature, humidity and air movement. In a cool, poorly ventilated basement the surface may still be damp the next morning; in that case waiting a little longer is better than covering wet primer with plaster.
At the plastering stage, follow the data sheet of the plaster being used. According to the MTP-7133 machine plaster data sheet, a 30 kg bag is mixed with 5.4–6.6 litres of water, the mix is used within 1 hour at most and a single coat is 5–25 mm thick. Ambient temperature must be between +5 and +35 °C, and work is not done on frozen or thawing surfaces, surfaces at risk of frost within 24 hours, in direct sunlight or in strong wind.
Can exposed concrete primer be applied to tiles or painted surfaces?
Tiled, ceramic and painted surfaces are not a defined use for MegaTech exposed concrete primer. Mega’s product information defines the primer for use indoors beneath gypsum, lime and cement-based mortars; on these surfaces, the routes below are followed.
What is used on tiled surfaces instead of primer?
If new tiles are to be laid over old ones, the right product is a tile adhesive, not a primer. In the MegaTech range, tile-on-tile bonding is defined for the wall and floor tile adhesive MTC-2221 (C1TE), and cladding over old ceramic, granite and marble for the ultra-flexible granite tile adhesive MTC-2233 (C2TE S2). For the difference between the classes, read our article the difference between C1TE and C2TE.
The old cladding must be sound; tiles that sound hollow are removed, and the surface is cleaned of dust and grease. If the tiled wall is to be plastered instead, the safest route is to remove the cladding, because tiles are not a substrate defined in the plaster data sheets.
How should a painted wall be prepared?
If a painted wall is to be plastered, the paint is removed first; the MTP-7133 and MTP-7111 data sheets require the surface to be cleaned of form oil, dust, paint and substances that reduce adhesion. Primer applied over paint ties the plaster to the paint layer, and if the paint comes away, the plaster comes away with it.
12 kg or 20 kg? Choosing the packaging
Both packs contain the same product; the size of the area to be primed decides the choice. For small jobs such as a few columns, beams or a single room’s ceiling, the 12 kg exposed concrete primer is more practical, and for large areas such as all the shear walls and ceilings of a flat, the 20 kg exposed concrete primer bucket.
The number of buckets is found by multiplying the area to be primed by the coverage per m² given on the packaging, plus a small allowance for waste. If you are unsure about the calculation, Mega’s technical team can help.
5 common mistakes when applying exposed concrete primer
The most common mistakes are priming a dirty surface, working on a frozen surface, applying a thick coat, starting to plaster before the primer has dried and applying the primer to a surface it is not defined for.
- Dusty or form-oiled surface: The primer bonds to the dust or oil film rather than to the concrete, and the plaster stays weak along with it.
- Frozen surface: The plaster data sheets state that the plaster must not be applied to frozen or thawing surfaces, or to surfaces at risk of frost within 24 hours. Because the primed surface becomes the base for the plaster the next day, check the weather forecast on the day of priming; for the primer’s own application conditions, follow the instructions on the packaging.
- Thick coats and runs: Primer applied thickly dries slowly, runs on vertical surfaces and varies in thickness from place to place. More primer does not mean better adhesion.
- Plastering without waiting: The data sheets require plastering to start once the surface has dried, so starting to plaster on the same day as priming is not recommended.
- Wrong surface: Tiles, paint and exterior facades are not defined in the product information; for tiles choose a tile adhesive or remove the cladding, scrape off paint, and consult the technical team for exterior facades.
Frequently Asked Questions
What does a concrete bonding primer do?
A concrete bonding primer helps plaster mortar grip a smooth concrete surface. According to Mega’s product information, MegaTech exposed concrete primer increases adhesion beneath gypsum, lime and cement-based mortars and reduces the absorbency of the substrate. It is used indoors on horizontal and vertical surfaces such as shear walls, columns, beams and ceilings.
Can exposed concrete primer be used on exterior facades?
MegaTech exposed concrete primer is not defined for exterior facades; Mega’s product information defines it for indoor horizontal and vertical applications. If exposed concrete on a facade is to be plastered, consult Mega’s technical team about surface preparation. MegaTech machine and hand plasters, however, are used both indoors and outdoors.
How many hours after priming can plastering start?
Mega’s plaster data sheets give the interval in days rather than hours: according to the MTP-7133 and MTP-7111 data sheets, exposed concrete is primed 1 day before plastering, and plastering starts once the surface has dried. Drying speed depends on temperature, humidity and air movement; if the surface is still damp the next day, wait a little longer before plastering.
Can exposed concrete primer be diluted?
Dilution is only done at the ratio stated on the product packaging. Extra water added by eye thins the primer, and once dry it may not leave enough of the rough layer the plaster needs to grip. Prepare every bucket on the same job at the same ratio. If the ratio on the packaging cannot be read or you are in doubt, consult Mega’s technical team before starting.
Can exposed concrete primer be applied over tiles?
Tiled and ceramic-clad surfaces are not a defined use for MegaTech exposed concrete primer; Mega’s product information defines it for use indoors beneath gypsum, lime and cement-based mortars. If new tiles are to be laid over old ones, the right product is a tile adhesive; in the MegaTech range this use is defined for the C1TE class MTC-2221 and the C2TE S2 class MTC-2233. If the wall is to be plastered instead, the tiles are removed.
Sources
- EN 998-1:2016 rendering and plastering mortar standard, scope (SIS)
- EN 13279-1:2008 gypsum plasters standard, scope (SIS)
- EN 13914-2:2016 internal plastering principles, scope (SIS)
- Mega MTP-7133 machine plaster technical data sheet (PDF)
- Mega MTP-7111 ready-mixed hand plaster technical data sheet (PDF)
- Mega Insulation Solutions technical documents
Both packs of MegaTech exposed concrete primer are listed in the exposed concrete primer category, and the machine and hand plasters that mention the primer on the MegaTech plasters page. For preparation suited to your surface, you can reach Mega Insulation Solutions’ technical team via the contact page.